Loading club corridor…
Transfer corridor
Saved on this device — no account needed
Certainty axis
Distance from the crest shows how close each deal is — read across, not down.Distance from the crest shows how close each deal is — tap a tab, then read the tick.









Olympique Marseille
ManagerOfficial
Bruno Génésio
· Contract to 2026
closer to joining

Lucas Da Cunha
Central Midfield.
Como
Olympique MarseilleT2
Fits the 4-2-3-1 — natural central midfielder
closer to joining
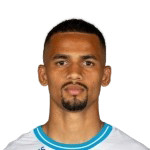

Iliman Ndiaye
Right Wing.
Sheffield United
Olympique MarseilleT2
Fits the 4-2-3-1 — natural winger
closer to joining


Mohamed Belloumi
Attacker.
Hull City
Olympique MarseilleT2
Recent activity
- LinkedIliman Ndiaye first linked from Sheffield UnitedOct 4
- OutgoingPol Lirola first linked away to BolognaSep 27
- LinkedMohamed Belloumi first linked from Hull CitySep 22
- OutgoingEmerson first linked away to JuventusSep 1
- ConfirmedPierre-Emerick Aubameyang move completed (Sportmonks-verified)Aug 30
- ConfirmedQuinten Timber move completed (Sportmonks-verified)Aug 30
- ConfirmedLeonardo Balerdi move completed (Sportmonks-verified)Aug 29
- OutgoingLeonardo Balerdi first linked away to RomaAug 28