Loading club corridor…
Transfer corridor
Saved on this device — no account needed
Certainty axis
Distance from the crest shows how close each deal is — read across, not down.Distance from the crest shows how close each deal is — tap a tab, then read the tick.





FC Köln
ManagerOfficial
Lukas Kwasniok
· Contract to 2028
closer to joining
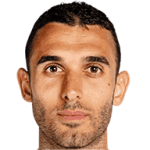
Ellyes Skhiri
Defensive Midfield.
OfficialEintracht Frankfurt → FC Köln
FC KölnT2
closer to joining

Thijs Dallinga
Centre Forward.
OfficialBologna → FC Köln
FC KölnT2Loan
closer to joining

Mikey Moore
Right Wing.
OfficialUnknown club → FC Köln
FC KölnT5Loan
closer to joining

Jahmai Simpson-Pusey
Centre Back.
OfficialUnknown club → FC Köln
FC KölnT1Loan
Recent activity
- OutgoingJulian Pauli first linked away to Odense BKSep 2
- LinkedEllyes Skhiri first linked from Eintracht FrankfurtAug 21
- LinkedThijs Dallinga first linked from BolognaAug 17
- ConfirmedMikey Moore move completed (Sportmonks-verified)Aug 5
- LinkedMikey Moore first linkedAug 2
- OutgoingJusuf Gazibegovic first linked away to Widzew LodzJul 26